Wednesday, August 24, 2016


Down The Rabbit Hole: My Next Cosplay Project!


As most of you guessed from my sneak peek ages ago, I'm working on a steampunk White Rabbit from Disney's Alice in Wonderland.

Now, this is my first-ever foray into leather working, so naturally John and I jumped in head first by starting with a fairly complicated mask. Heh. I turned to Youtube for tutorials - and highly recommend this one from Merimask - but we still were figuring out a lot of things as we went along, since every tutorial offers slightly different advice.

I started by modeling my mask after Andrea/Merimask's "Gentleman Bunnies" design:

You can actually buy one of these (or a similar style without the monocle) at Andrea's Etsy shop for $200, but since this is to be the focal point of my entire costume, I was determined to make it myself. I'm just stubborn like that. And cheap. But mostly stubborn.

Aaaaand here's my mask (so far):

I may still adjust one or two things, but over all I'm pretty pleased for our first try!

John did the hardest part, which was drawing and adjusting the paper template, stopping to crinkle it over my face every few minutes to check the fit. When he was satisfied, he cut it out of vegetable-tanned, 8 oz leather and handed it over to me to sketch on. I drew in my design details, and then he did the carving:

John is really enjoying this new hobby, so I practically had to pry the mask out of his hands to do my own work on it. :)

Next we soaked the mask in water and formed it on my face. This was tricky, since the muzzle really needed to stand out, but I kept working at it with my fingers, and was eventually satisfied with the shape. (Interesting note: saturated leather is oddly clay-like, and very malleable.) We also shaped the ears a bit.

We propped up the formed mask on parchment paper, and then baked it at about 200 degrees until it dried:

You know it's dry when the mask color lightens up again. (It gets quite dark when you soak it.) Takes maybe 20 minutes, tops.

We used 7 to 8 pound leather for the mask, although I've since learned that we probably could have used something a bit thinner. This thickness is rock hard when dry, and feels more like wood than leather on my face. Good thing it's molded to fit so well!

 
 Here's the formed mask next to my original sketch. As you can see, we got it pretty close.

As much as I like the color of undyed leather, I couldn't really be the White Rabbit without, well, some white. So next came priming and painting:

I used a water-based primer, and then plain acrylic craft paint for the white. The gold sections were painted with Liquid Leaf - which is NOT water-based, but gives a nice shine.


As soon as I finished the gold I realized the contrast was just too stark, so next I aged the entire mask with a lovely yellowish-brown water-based glaze. (The advantages of being married to a former faux-finisher: custom glazes on demand!)

I went a little overboard with the aging, though, so even though I loved the look, I had to go back and white-wash the white sections again to brighten it up. After all, I don't want to be the Cream Rabbit.

(More on my giant pocket watch in a minute.)

The monocle was WAY harder than the mask, and took three times as long to make. I spent hours on the paper template, shaving off millimeter by millimeter to get it to fit the mask contours exactly. I first made a vinyl version, but then started over with a thicker leather for a more authentic look. I also started out with a vintage flashlight lens, but then abandoned THAT for the fun metal edging you see here:

I cut my own lens out of plexiglass, and added a scrim by stretching a scrap of thin black pantyhose over the back. Finally I formed & stitched the cup, added decorations, and riveted the whole shebang onto the mask.

The finishing touch was a thick gold chain attached to the side.

That process was stretched over more weeks than I'd care to admit. I've come to realize I am the world's slowest crafter, just because I figure things out as I go, instead of starting with a clear-cut design and plan of attack. I like the process, but it does get frustrating.

Now check out this loveliness:

Sha-POW!

This is what you get when you let weeds overtake your backyard: a lovely, springy ground cover in brilliant green. Who needs grass? I like this stuff!

Oh, and I just realized the scale of this picture makes my mask look tiny, but I can assure you that's just a giant pocket watch. :) It's actually a vintage wall clock, but I removed the electrical guts and replaced them with a lightweight battery operated clock mechanism, so it even works! I also jazzed up the face with metallic gear cutouts and gems. (Still not 100% happy with it, but it's on the back burner for now.) The thing still weighs a ton due to its heavy metal case, but there's no way I could make something like this entirely from scratch.

Thursday, August 11, 2016


Broom Parking Halloween Sign

The other day, I saw this great free printable and loved the saying!  I think it is so clever!  So, being the crafty lady that I am, I decided that I wanted to use the same saying, but do something a little more than just print it out on paper.

I got this wood plaque at the craft store for just over $3, and painted it orange. 
Now, this would be really easy to do with vinyl lettering...if you had that option;) But since I don't, I often use paint. 
I pick out a font I like on the computer, make it the right size, and print it out on regular printer paper. 

I cover the back of the paper with chalk or pencil lead rubbing, which acts as a transfer - but rubs off the wood when you are done. 

After lining the paper up on the wood, I carefully trace around the letters with a pen or stylist.  This leaves the chalk or pencil lead impression on the wood. 

Using the chalk/pencil lines as guides, I use my embossing tool (looks like a pen with a fine metal tip on the end), dip it in paint, and trace it along the lines.  It takes a little while, but still looks great when you are done. 
 As you can see, I traced it line by line, waiting for the line above to dry before starting the next. The witch hat graphic I found online, and traced and painted it using the same method.
After I was finished painting it, I roughed up the edges with sandpaper, and brushed some of the edges with distress ink - to make it look a little weathered. 
 I bought a couple of hooks at the hardware store, and screwed them in evenly on the bottom of the plaque. 

Finally, I added some hanging hardware, hot glued a plastic spider to the sign, and draped some spider webs along the corners. 
So easy and so funny!
 I got this great kid's broom and set it in the hooks, and even added a little plastic toad, sitting on the broomstick. 
 As I get around to it, I may embellish the broom a bit - but I just love the way it looks on the wall!


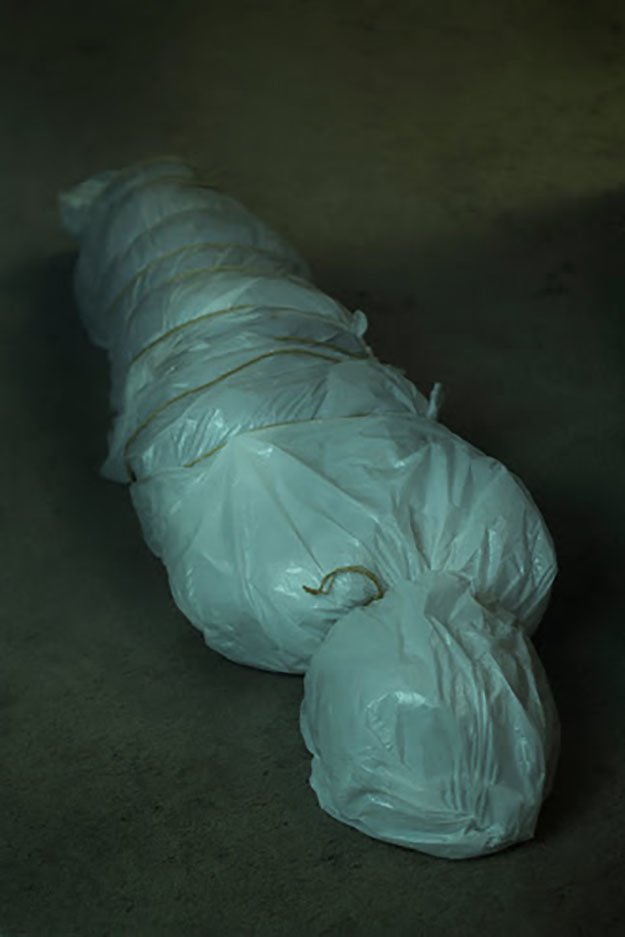
body bag #2

8. Body Bag

10 Easy Dollar Store Halloween Decorations You Should Try
You don’t need a real body to wrap in this bag.

Supplies:

10 Easy Dollar Store Halloween Decorations You Should Try
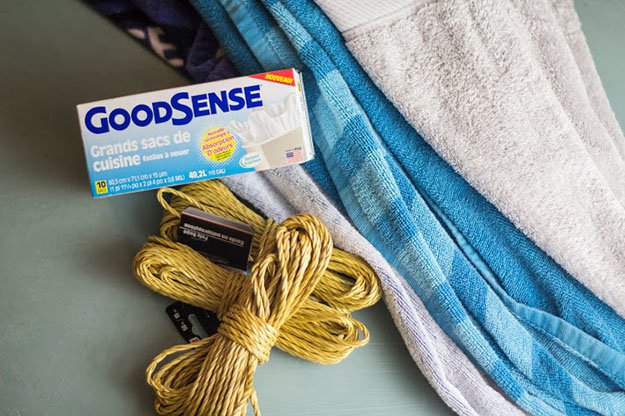
-White garbage bags
-Rope
-Towels and sheets from around the house (they won’t be damaged, so you can just pull them out after Halloween)

Instructions:

-Lay a sheet on the ground and spread some towels and other linens on it (in a line about 5-6 ft. long).
-Now plump and shape all the linens (except for the big sheet that they are all laid on), so that they are: narrowest at one end (the “feet”), widest about a foot from the top (the “shoulders”), and round and head-shaped (for well…the “head”, of course ; ).
-Now we’re going to wrap up our handiwork in the big sheet that we put underneath it all.  Carefully wrap the sides of the sheet around the “body” of linens that you have just formed.
-Once that’s done, open up some garbage bag and layer them around the “body”.  Hold them in place with your rope, cinching it around everything tightly for a creepy effect.  You can use the rope to accentuate the form of the body even more (look how much definition is given to the head, for example, by tightening the rope around the neck area).
-And you’re done – creeeepy!  I shut mine away in our storage closet until Halloween, because it was giving me the shivers every time I looked at it!
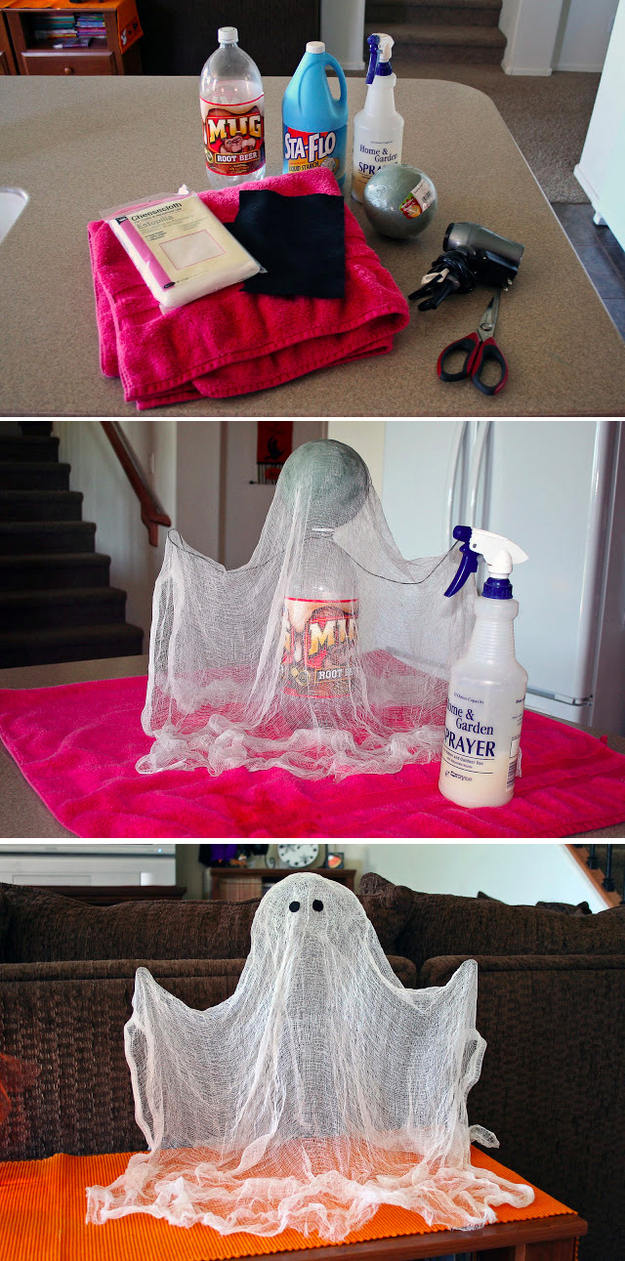
Use cheesecloth to make a floating ghost.

Build a ghost shape out of a soda bottle, wire, and a ball. Spray with starch and let dry. Here’s
.

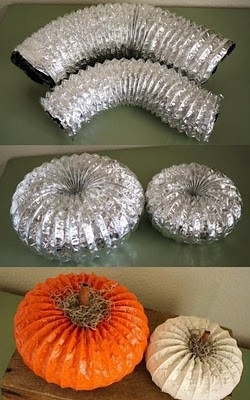
Use ducting hose to make a fake pumpkin.

Use ducting hose to make a fake pumpkin.

Pick up the ducting and some orange spray paint at a hardware store. Then throw some twigs on top.

Wednesday, August 10, 2016

DIY Spooky Spider Wreath

The spider wreath is even easier and cheaper than the spooky tree! And, it’s a quick project too! You’ll have NO problem getting this done before Halloween!
Materials
– 1 6-ft. tube of pipe insulation (less than $1.50 at my Lowe’s!!)
– X-ACTO knife
– duct tape & friction tape
– spider webbing
– plastic spiders
– ribbon
Directions
– First up, make your wreath form. You’ll start by cutting the pipe insulation just under the half way point.
– Connect the ends with duct tape. Then, cover the duct tape with friction tape. (Friction tape is similar to electrical tape, but normally used for hockey sticks, baseball bats, etc. and has a slightly sticky feel to it.)
– Wrap the wreath form with spider webbing–making sure to bring some across the open circle. Little pieces of friction tape and/or straight pins, will help hold the webbing in place.
– Once you have the webbing the way you like, cut any remaining webbing off, decorate with spiders, and add a ribbon to the top. Then, you have your own spooky spider wreath!
Fun, huh?!

Window Monsters — Easy, Cheap DIY Halloween Decorations